Unity Input System Step-By-Step 最简教程
#Overview
本教程极大程度的参考了 Unity Learn 上的官方教程[^1],但并不是其翻译版本,而是根据我的学习过程进行相应增删改。
完整工程见:xuejiaW/InputSystemSample: A minimum unity project to illustrate how to use Unity new input system. (github.com)
Unity 有内建的 Input Manager 机制,这一套机制存在了非常久的时间。针对于传统的键盘,鼠标等输入,内置的 Input Manager 可以健壮的处理,但 Input Manager 的可拓展性不高。也因此随着输入设备种类的增多(如各类 XR 设备),Input Manager 无法优雅的解决这些输入。
Input System 是 Unity 为了解决 Input Manager 的上述问题,提供的高可拓展性,高自由配置的新输入解决方案。
对于新工程,Unity 官方都推荐使用 Input System 作为输入的解决方案,但 Input Manager 并不会短期内被废弃,因为历史包袱过重[^2]。
Input System 依赖 Unity 2019.1 及以上版本,本文档基于 Unity 2022.3.15f1 + Input System 1.7 编写
#Get Started
#安装 Input System
首先通过 Unity Package Manager 安装 Input System: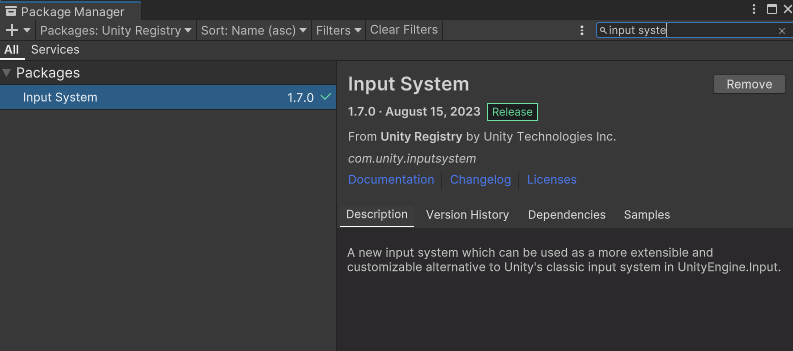
在安装 Package 后,会自动弹出如下窗口,该窗口表示 Input System 启用后需要重启 Editor Backend 才能正常使用,点击 Yes 启用 Input System,此时 Unity Editor 会自动重启: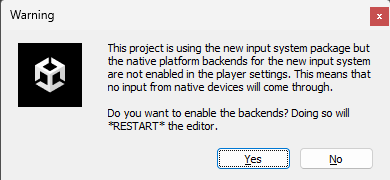
当 Unity 重启后,根据 Unity 版本的不同,可能内置的 Input Manager 会被关闭,如果要重新启用,可以在 Edit -> Project Settings -> Player -> Other Settings -> Active Input Handling 中选择 Both: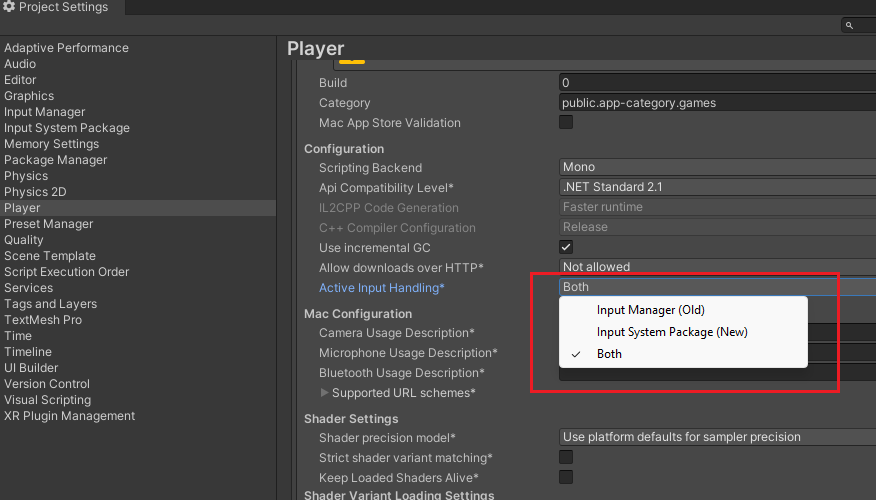
至此 Input System 已经被正确安装。
为方便后续的调试,Demo 工程中预先引入了 URP 和一个最简的测试场景,此时的工程的见:A
xuejiaW/InputSystemSample at 7d041a5604c71096b0147cd0ae672557eee517c8 (github.com)
#创建 Input System Assets
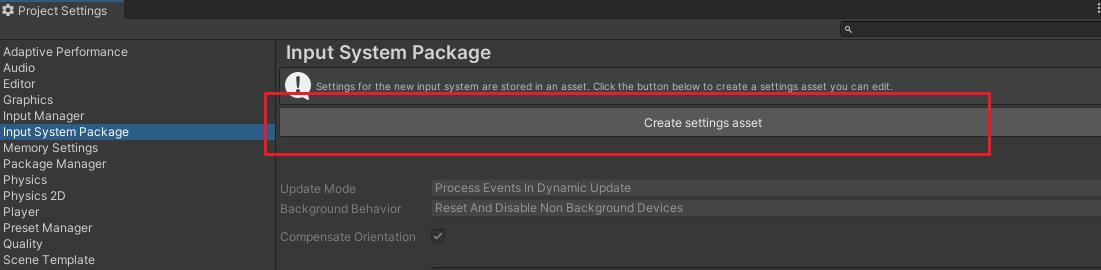
为了使用 Input System,推荐先创建 Settings Asset,你需要在 Project Settings -> Input System Package 中创建相关资源:
该 Settings Asset 作为 Input System 全局的配置,但其并不是必须项。如果未创建该文件 Unity 会使用默认的 Input System 配置。
当点击创建后,会在工程的根目录创建出一个 InputSystem.inputsettings 文件,该文件即是 Input System 的总配置文件。同时原 Input System Package 页面也会包含有一系列的针对于 Input System 的配置项: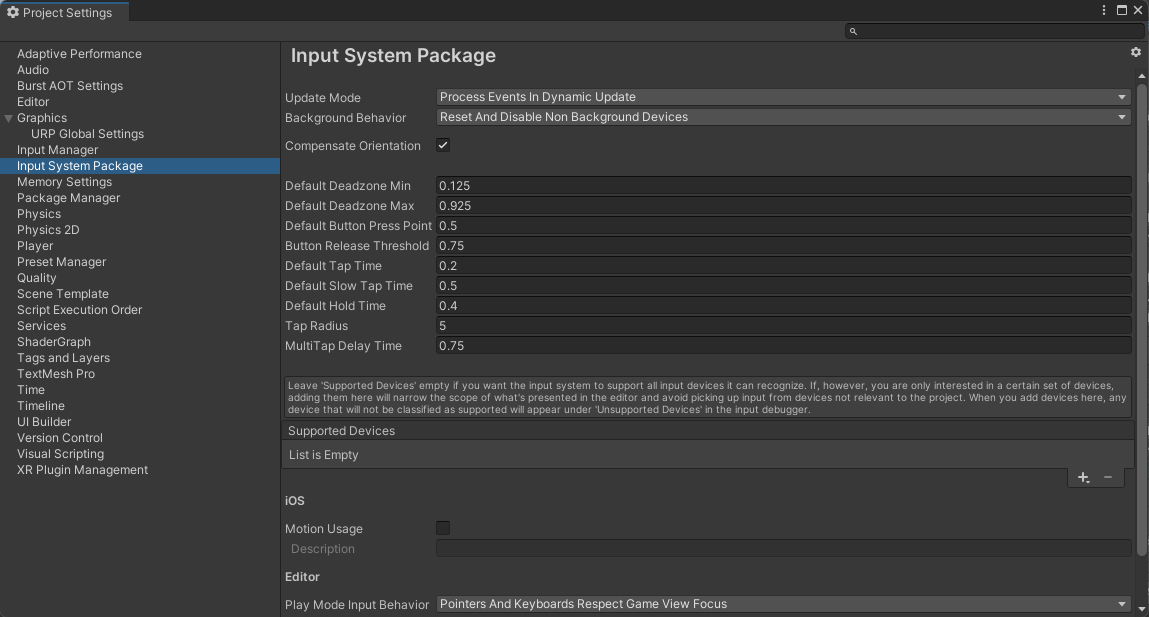
选择创建出来的 InputSystem.inputsettings 文件,在 Inspector 中会出现直接跳转到 Input System Settings 的按钮,点击该按钮,同样会跳转到上述 Input System Settings 的配置页面: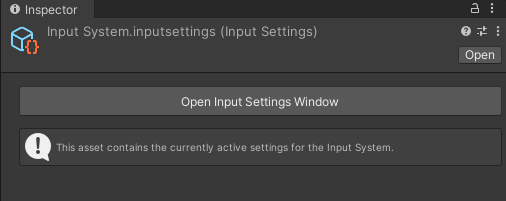
你可以随意修改 InputSystem.inputsettings 的位置,并不要求该文件必须在工程根目录下。
此时的工程状态见:
xuejiaW/InputSystemSample at 62aff15fcf5c3479e5a3073af7646a6c2775e043 (github.com)
#查看 Input Debugger 窗口
你可以在 Window -> Analysis -> Input Debugger 中打开 Input Debugger 窗口,该窗口中可以显示当前连接的输入设备:
#使用 Input System
#创建 Input Action Asset
如场景中有如下小球: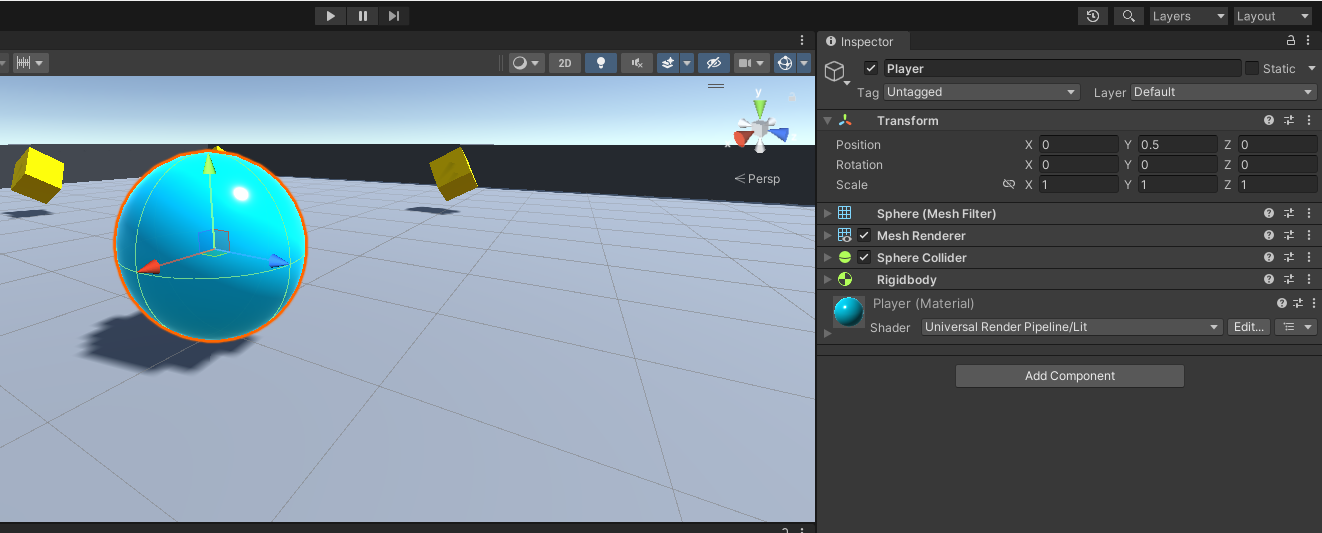
为了让其移动,可以为它添加一个 Player Input 组件,在 Player Input 组件上,选择 Create Action 创建出一个 Input Action 资源: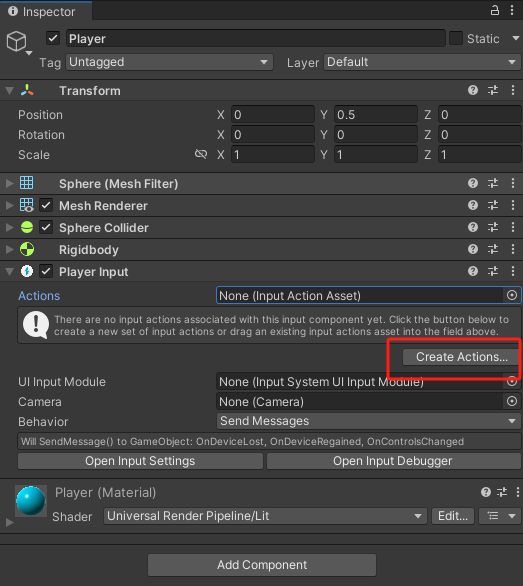
当点击后,会需要你选择保存的路径,选择后,会在该路径下创建出一个 Input Action 资源( Input System.inputactions),并自动打开该资源的配置窗口,窗口如下所示: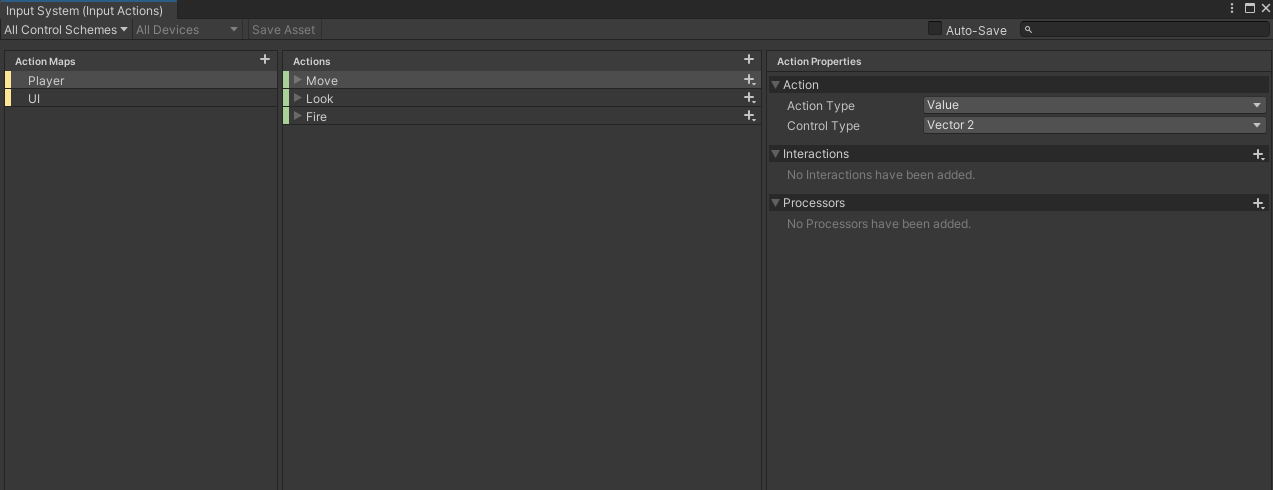
创建出来的 Input Action Asset 资源如下所示,当点击该资源上的 Edit asset 按钮或双击该资源,都将打开上述的窗口: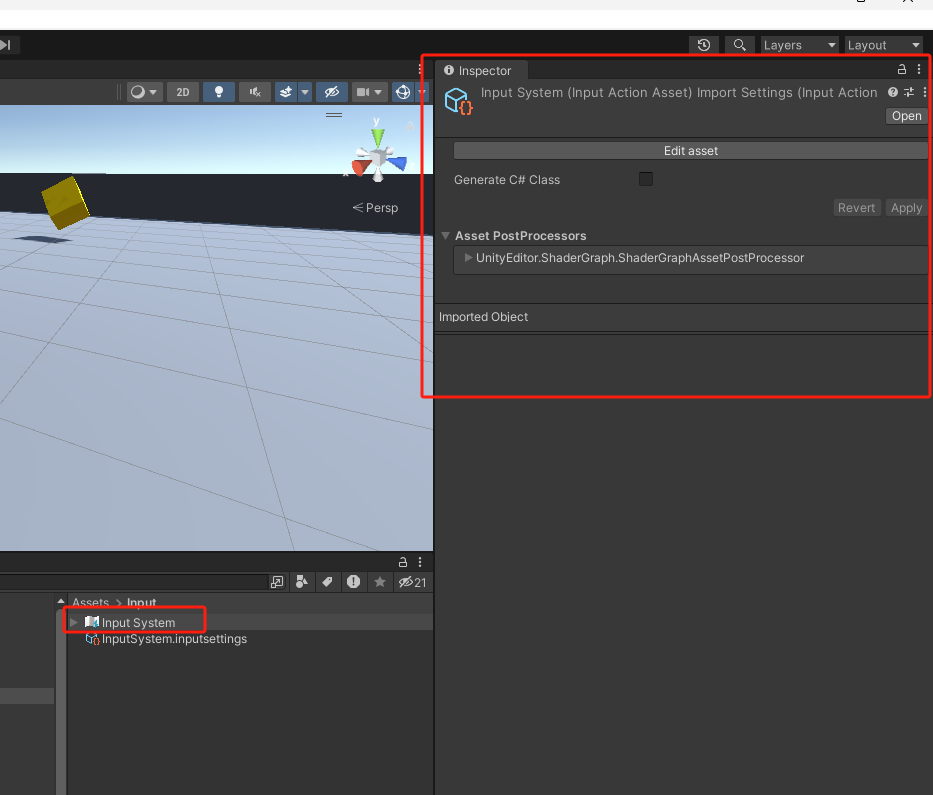
具体查看 Input Action Asset 中的 Move Action,可以看到其中通过定义了可以通过键盘的 WASD 和 上下左右 触发: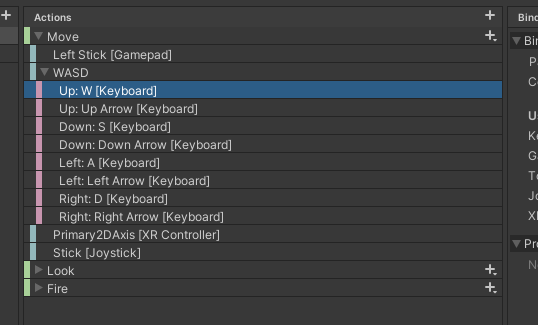
此时按下 WASD 或 上下左右,会发现小球还 不能 移动,因为此时小球只是 获取 到了输入信息,但还是没有 处理 这些输入信息。
此时工程状态见:
xuejiaW/InputSystemSample at ed81be6f2efcf89c72f287240c9b56ea80a24094 (github.com)
#使用代码控制小球
为了处理 Input System 的输入信息,可以添加 PlayerController 脚本,其实现如下:
1 | using UnityEngine; |
其中的 OnMove 对应 创建 Input Action Asset 后 Asset 中的 Move Action: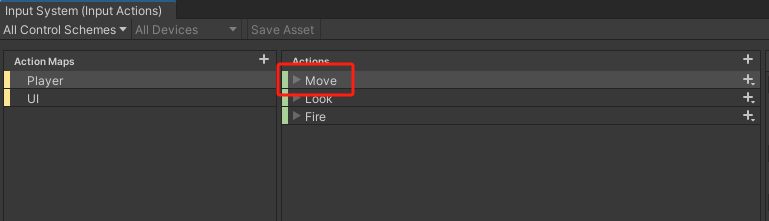
对于 Asset 中任意名称的 Action,都可以通过 On<ActionName> 监听到。
如果 Action 叫做 AAA,则可以定义 OnAAA 函数监听。
将该脚本挂载在 Player 上,如下所示: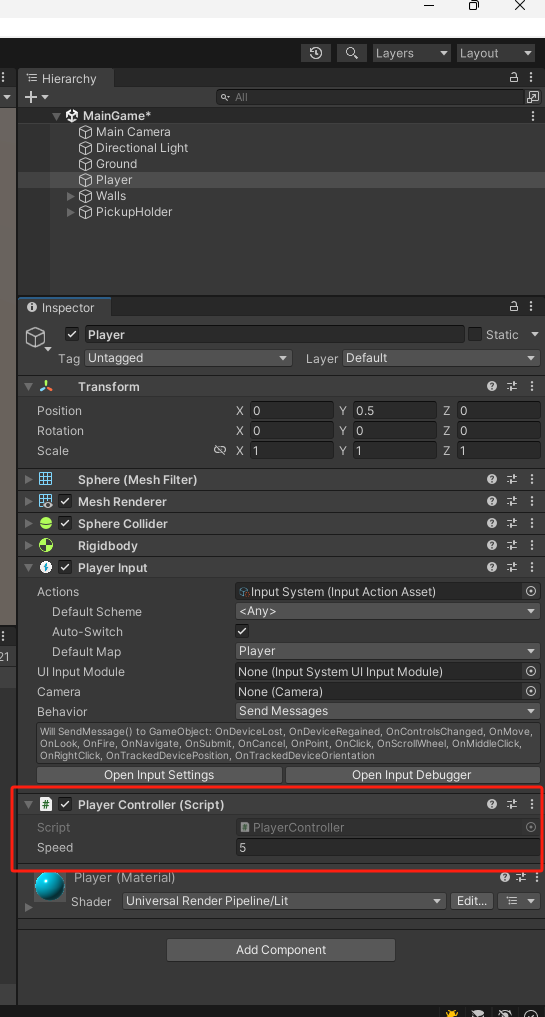
此时小球就可以通过键盘的 WASD 和 上下左右 移动:
此时的工程状态见:
xuejiaW/InputSystemSample at 9cb75b9a8719cc8e695ac32ad786adcc007494d8 (github.com)
#自定义 Action Asset
在上 创建 Input Action Asset 步骤中,创建出来的 Input Actions 是 Unity 默认实现的,即适合于 Player Input 组件的 Actions 资源。
Player Input 组件也是 Unity 内建的读取 Assets 资源的脚本
在这一节,会自定义 Actions 资源,并自定义使用该 Actions 资源的脚本。
#创建自定义 Action Asset
在 Project 面板中,空白处右键选择 Create -> Input Actions,创建出一个新的 Input Actions 资源:
双击创建的资源(本例中为 BallControls.inputactions ) 后会打开空白的 Input Actions 窗口: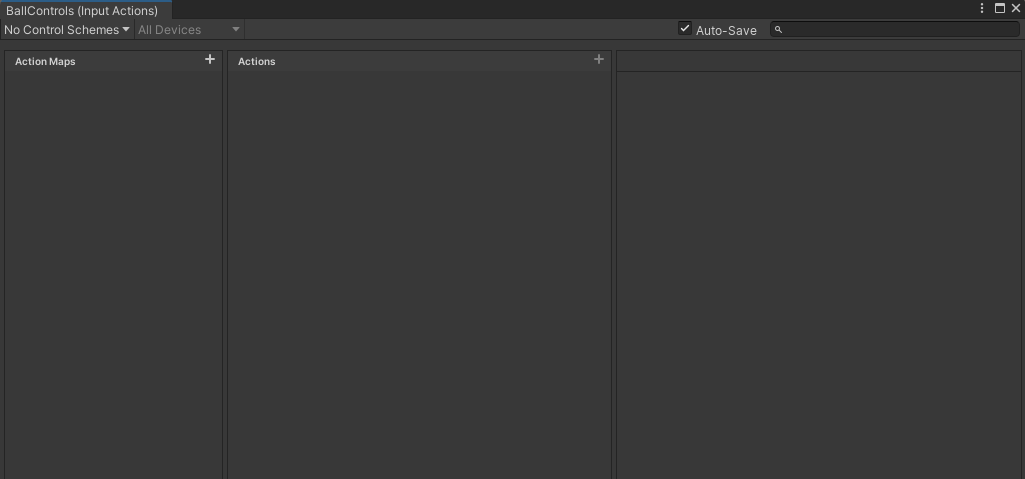
此时点击画面左侧的 + 号可以创建出 Input Action Map,我们将新增的 Input Action Map 命名为 BallPlayer:
在窗口中间,可以为这个 Input Action Map 创建一些 Input Action,如下过程,创建了 Buttons 这个 Input Action:
在窗口的右侧,可以为 Input Action 创建一系列 Input Binding,如下步骤分别绑定了 GamePad 的 East Button 和 West Button :
GamePad 的 East 和 West Button,在 Xbox 控制器上分别对应 X 键和 B 键
你也可以继续为 Buttons Action 绑定 Keyboard 的 F1 和 F2 按键,步骤如上,当绑定完成后,整个 Buttons Action 如下所示: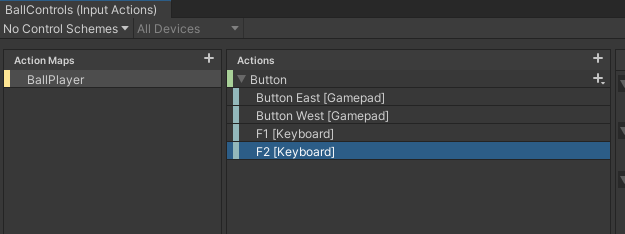
进一步创建 Move Input Action ,与 Buttons 不同是,Move 需要将 Action Type 设置为 Value,且 Control Type 为 Vector2,这表示 Action 会返回 Vector2 数据,即用于平面移动的上下左右数据:
如之前步骤一样,为该 Move Input Action 绑定 Left Stick,绑定后结果如下: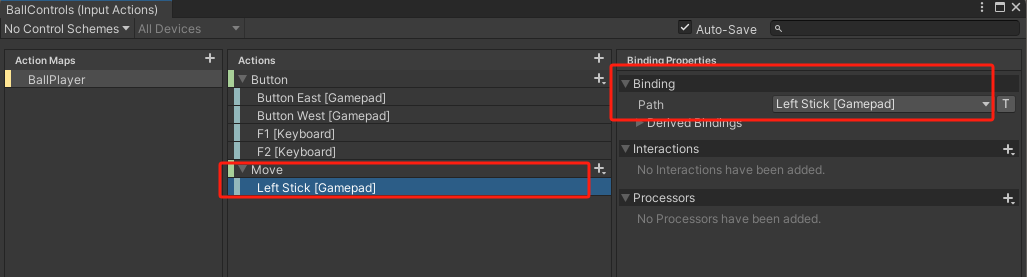
也可以将键盘上的按键通过 组合绑定(Composite Bindings) 至 Move Input Action,如下所示,其逻辑为使用四个按键分别表示 Vector2 四个方向():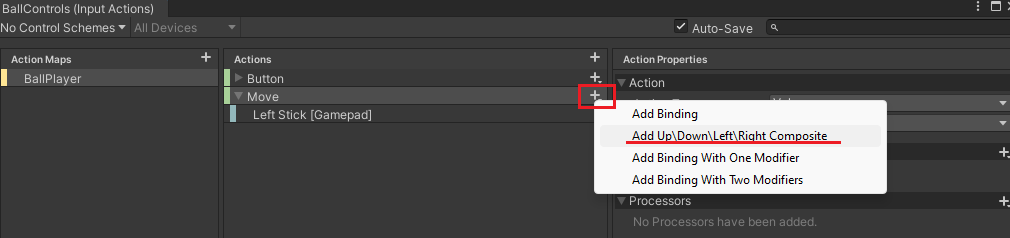
分别为上下左右四个方向设定四个按键 K,J,H,L,结果如下所示:
至此,自定义的 Action Asset 创建完成,其中定义了使用 GamePad 和 Keyboard 两种输入设备,分别控制 Buttons 和 Move 两个 Action。将新建的 BallControls.inputactions 替换掉 Player Input 组件中的 Actions,即可使用新的 Action Asset: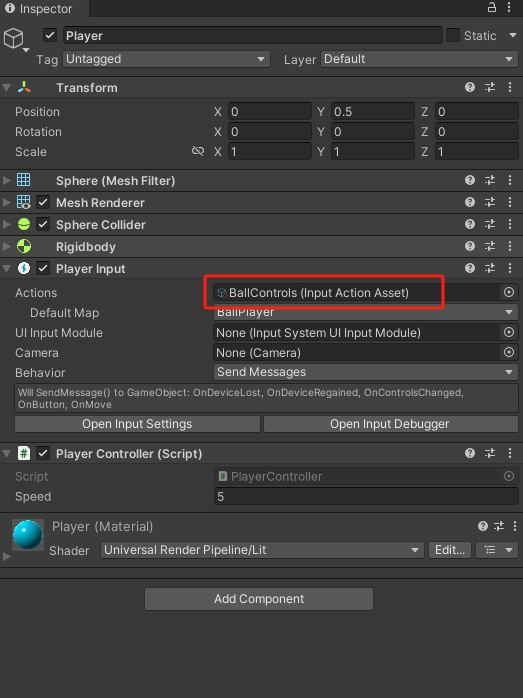
此时运行游戏,可以发现通过手柄的左摇杆和 HJKL 都可以控制小球的移动,而 WASD 则不行了。
这是因为 PlayerController 脚本监听的 Motion 事件在 BallControls.inputactions 中也存在,因此我们定义的左摇杆和 HJKL 四个按键都能响应,即使不修改 PlayerController 也可以正常运行。而原 PlayerInput.inputactions 中的 WASD 我们并没有绑定,所以无法相应。
此时的工程状态见:
xuejiaW/InputSystemSample at 8d994e47fbf7c766c87aa62ce517e7e5bdda031b (github.com)
#创建自定义 Player Input
#手动解析 Actions Asset
自定义一个 BallController 脚本,用于解析刚刚创建的 BallControls.inputactions,其实现如下:
1 | public class BallController : MonoBehaviour |
可以看到,该脚本直接引用了之前的 InputActionAsset ,并使用了 InputActionAsset.FindActionMap](https://docs.unity3d.com/Packages/com.unity.inputsystem@1.7/api/UnityEngine.InputSystem.InputActionAsset.html#UnityEngine_InputSystem_InputActionAsset_FindActionMap_System_String_System_Boolean_) 找寻之前创建的 BallPlayer [Input Action Map,并在 OnEnable 和 OnDisable 时启用和禁用该 Input Action Map。
另外脚本中通过 InputActionMap.FindAction](https://docs.unity3d.com/Packages/com.unity.inputsystem@1.7/api/UnityEngine.InputSystem.InputActionMap.html#UnityEngine_InputSystem_InputActionMap_FindAction_System_String_System_Boolean_) 找寻之前创建的 Buttons 和 Move Action,并监听了 [Input Action 的 performed 事件,触发对应的回调函数 OnButton 和 OnMove。
至此 BallController 脚本已经完全实现了之前 Player Input + PlayerController 的功能,因此在 Player 游戏物体上仅需要 BallController 脚本即可,注意要将之前创建的 BallControls.inputactions 挂载至脚本中: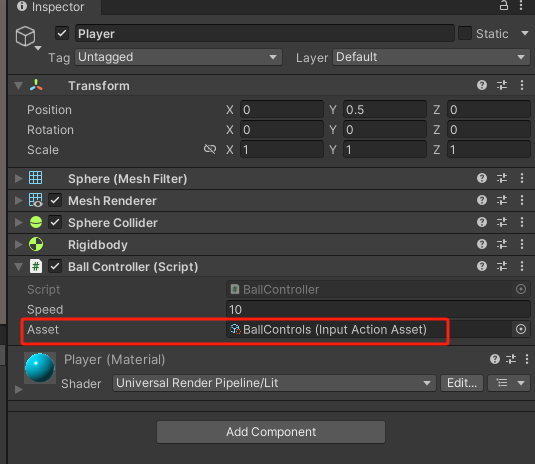
此时小球可以如同之前一样的通过手柄和键盘控制移动。
此时工程状态见:
xuejiaW/InputSystemSample at f070c14f0671d7c1c702b270f3751aed8c003692 (github.com)
#基于 Actions Asset 自动生成对应类
在 手动解析 Actions Asset 中需要手动管理 Actions Asset 并从中读取 Input Action Map 和 Input Action。
上述的读取过程,会随着 Action Assets 中的数据变更而出现潜在的失效(如命名错误),因此 Unity 提供了从 Action Assets 中自动创建相应脚本的能力,可以简化上述步骤。
可以选择 Action Assets 便选择,并勾选其中的 Generate C# Class ,选择需要创建的类名称,文件和命名空间,并点击 Apply 正式创建脚本: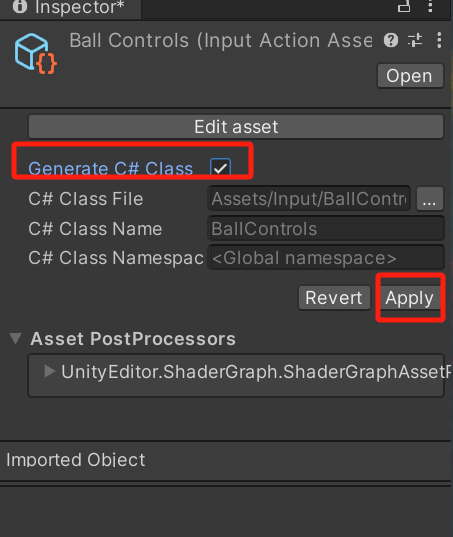
此时会创建出对应的脚本: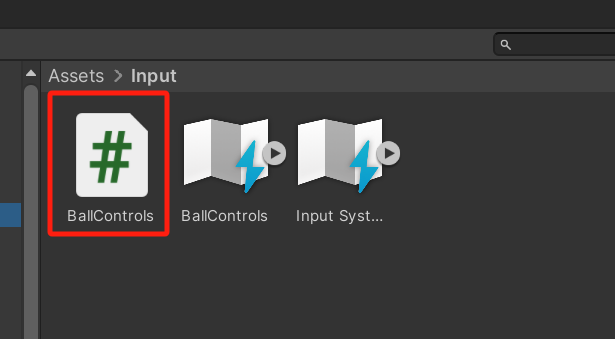
修改之前的 BallController 脚本,以适配自动生成的 BallControls,如下:
1 | using UnityEngine; |
此时不再需要手动获取 Input Action Map 和 Input Action,只需要使用 <ActionControls>.<ActionMapName>.<Action> 的风格直接访问即可。
此时将之前挂载在 Player 上的的 BallController 脚本换为 BallController_AutoScripts 脚本,并运行,可以看到效果与之前的效果无差别。
此时工程状态见:
xuejiaW/InputSystemSample at a92af1df6ccfb22f2747548d2abf1a08c43a3407 (github.com)
#Reference
 wechat
 alipay